Moulding
small plastic components Part 1
In which we make worms from Plasticene and indulge in
some microwave abuse.
When I was restoring my Giulietta Spider there were a
couple of items I needed which I couldnt locate anywhere so I had to figure
out a way of making them. The trickiest was the cam cover bolts which had cast
onto the heads a black plastic knurled surround with Alfa Romeo script on the top face, and the other was the number
plate light.
What was left of the number plate light was demolished
when the car rolled off the trailer and hit the garage wall, but I was
fortunate in being able to borrow an original one to copy.
To make moulds
of the parts, I found in my local craft warehouse some new material which looks
like rubber but is actually PVC. This is blue in colour and can be melted by
putting it in the microwave oven for a couple of minutes, when it takes on the
consistency of thick cream.
I tackled the number plate light lens first and
started by gluing it down onto a piece of stiff card board. I then constructed
a sort of dam round it by folding a 2 wide strip of card into a box and
Selotaping it to the base. After heating the PVC I then poured it over the lens
to a depth of about 1 and left it for a few minutes to cool. I then pealed off
the card but left the lens embedded in the mould.
The next stage was to create a mould of the inside
face of the lens, so the block of PVC complete with original lens was inverted
and another strip of card was folded around the block of rubber and secured to
it with Selotape. I cut it wide enough to leave the top edge standing above the
face by about 1.
To create a path for the resin to enter the mould and
the air to get out, I rolled up a small amount of Plasticine into a worm about
1/8 diameter and cut it into four pieces, which I then very carefully stood on
the four corners of the inverted lens.
I then coated the surface of the mould with some
release agent which I had, but if you dont have any, grease the surface
lightly with Vaseline so you can separate the two halves. Next job was to melt
some more PVC and pour it into the mould. When it was set, I separated the two
halves, removed the lens and the Plasticene plugs, and was then in possession of
a finished mould.
From the same place I bought the PVC, I bought a small
can of casting resin and a small bottle of hardener. This stuff is completely
clear and is fairly slow setting so you dont get a problem with heat build up
and discolouration.
To use the mould, I first Selotaped the two halves
together making sure they were properly lined up. I then mixed a small amount
of resin and a few drops of hardener in a small dish, being careful not to
introduce any air bubbles.
I then poured
the resin down one of the holes left by the Plasticene plugs, just a bit at a
time and tilting the mould back and forth to make sure the resin completely filled
the mould and that all the air was excluded. I finally poured the last of the
resin in until it came back up all the other holes.
After leaving for a few hours to set I split the mould
to reveal a perfect reproduction of the original lens even down to the Hela
name and serial numbers. The four extra branches created by the pouring holes
were carefully cut off and all the edges given a final fettling and it was
ready to use.
Casting the cam cover bolt surrounds was a bit more
complicated and I will cover that next time.
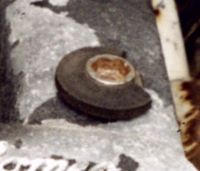
Re-making these broken cam cover bolt
mouldings will be covered next time